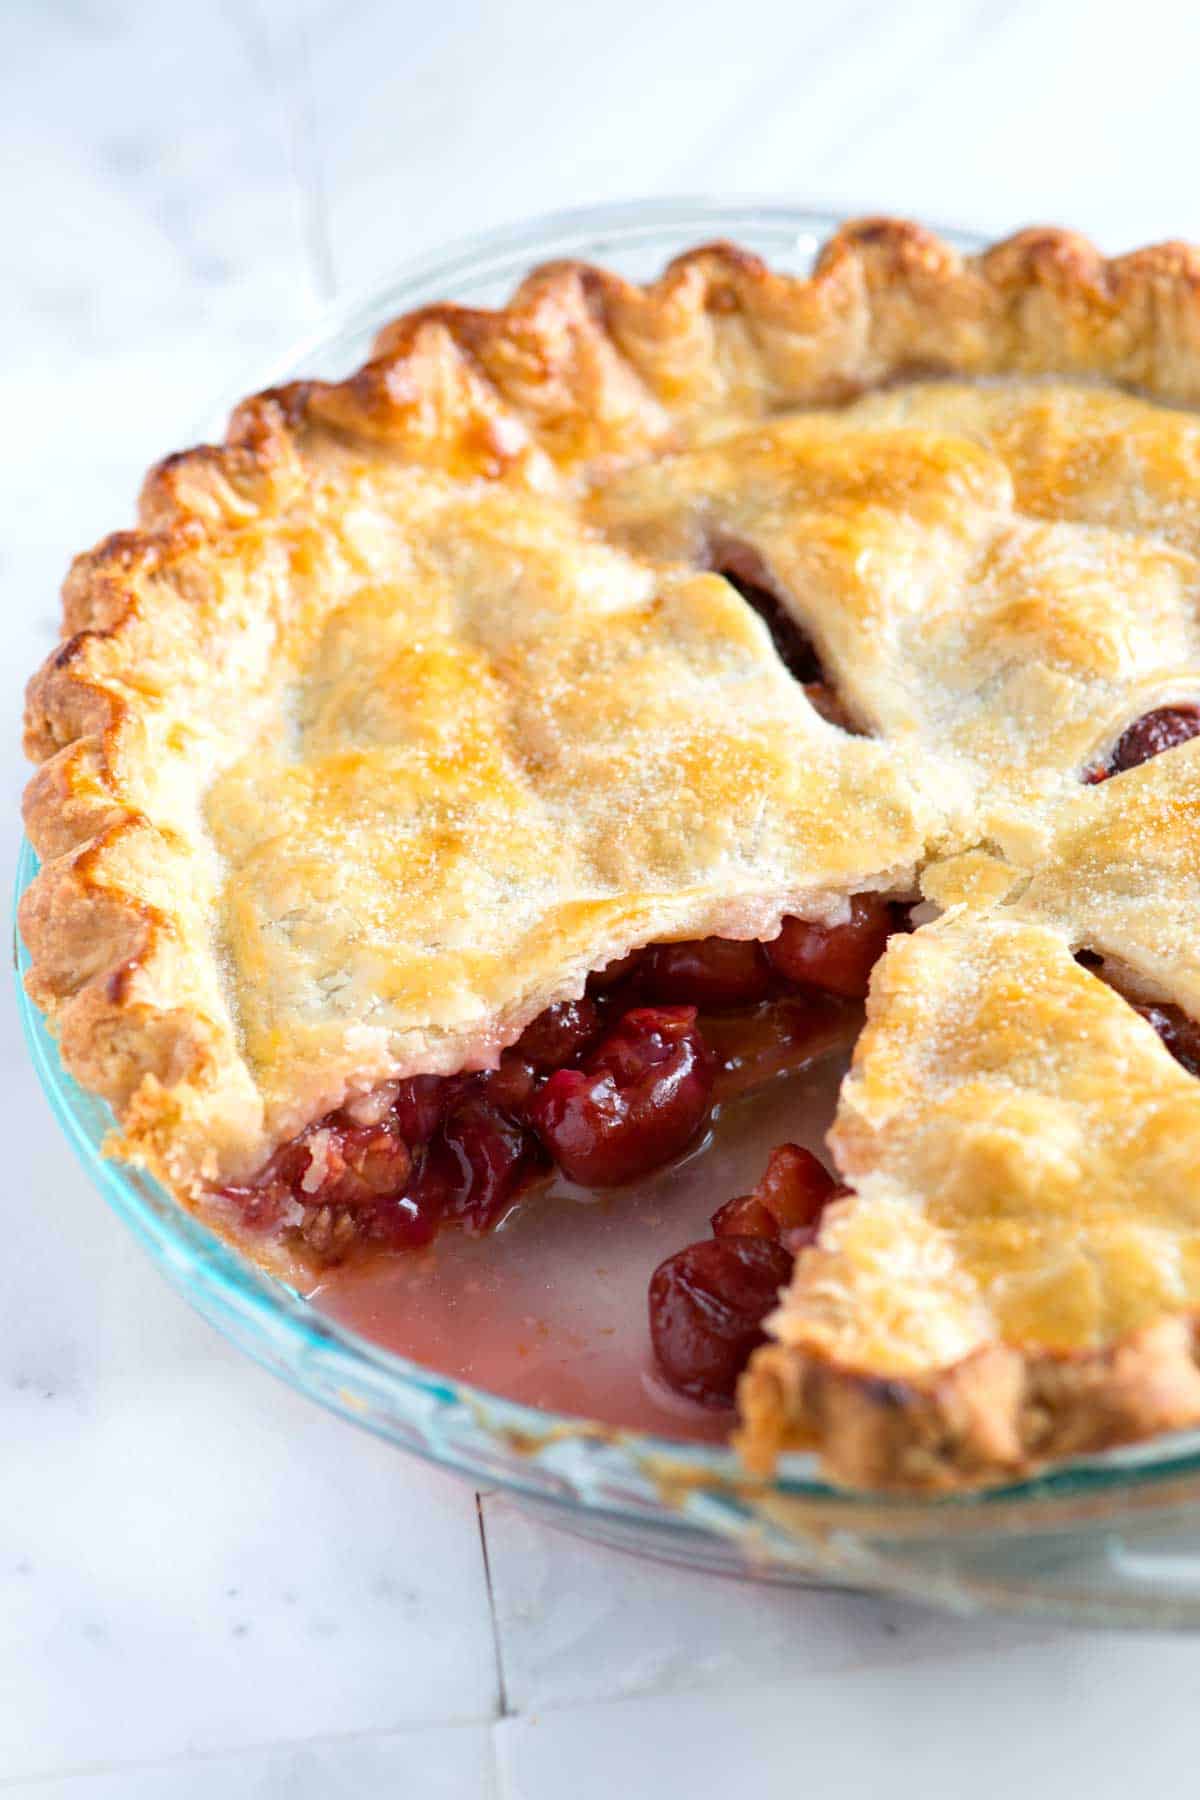
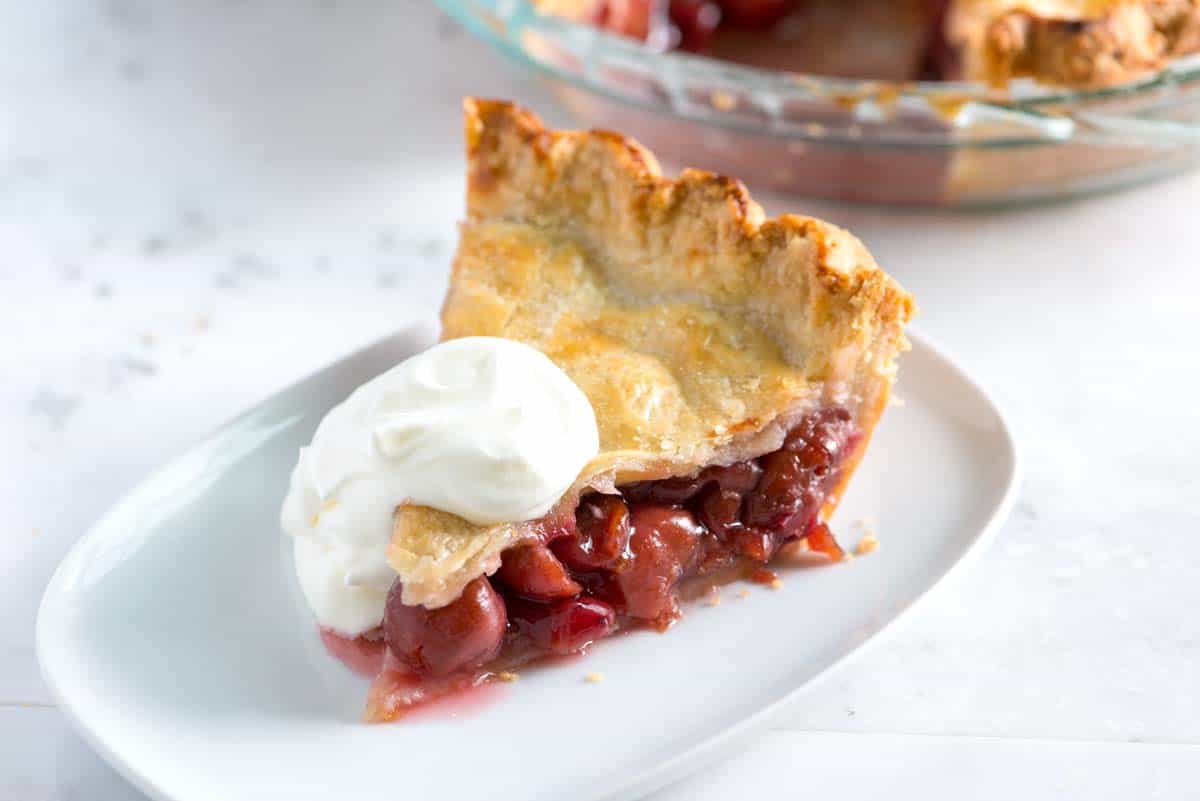
My family loves this homemade cherry pie! When cherries come into season, we jump at the chance to make it. I love this homemade pie with fresh cherries. I’ve made this cherry pie recipe with sweet and sour cherries and plan to make it soon with a mixture of both!
Key Ingredients
Pie crust: You can use homemade or store-bought pastry. I use my favorite homemade pie crust recipe to make this cherry pie. It’s made with butter and hasn’t failed me yet. Cherries: I love fresh cherries for this pie. You can use sweet cherries or tart cherries. If you use sour cherries, consider increasing the sugar in the filling. I have provided tips in the recipe below, where you will also see my tips for using frozen and canned cherries in this pie. Sugar: I use granulated sugar in the cherry pie filling, but brown sugar would be fine. If you have tart cherries, increase the sugar. I’ve included tips for how much below the recipe. Lemon, vanilla, and almond extract: I love the combination of flavors in this cherry pie! Cherry and vanilla is such an amazing combination, and when you add the almond and lemon, it gets even better! Cornstarch: We need cornstarch to thicken the pie filling. Although some recipes call for flour, cornstarch worked best in our testing. Butter: A tiny bit of butter makes the filling shiny and extra delicious. Egg yolk and cream: We whisk them together for our egg wash, which we brush over the crust. As the pie bakes, the egg and cream make the crust turn golden and shiny.
How to Make Homemade Cherry Pie
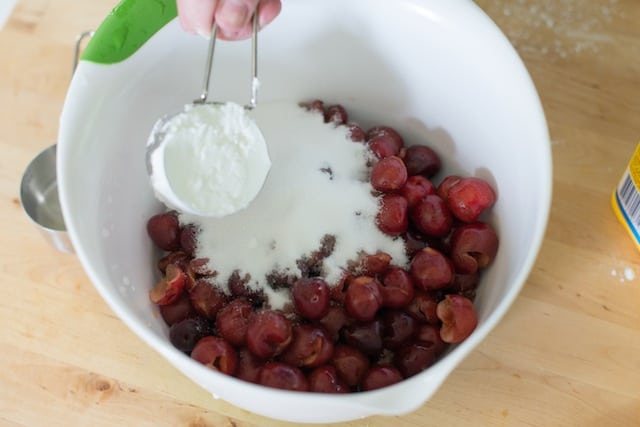
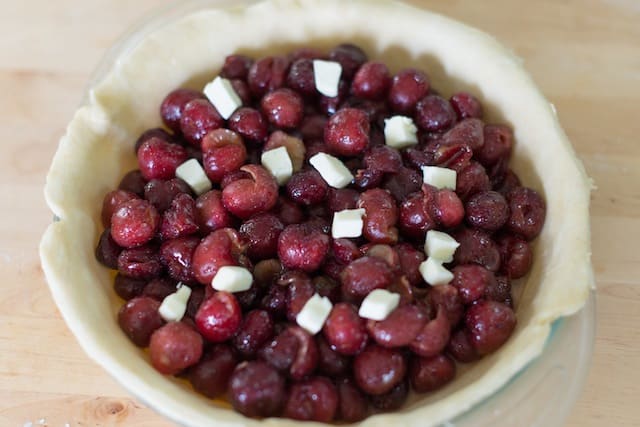
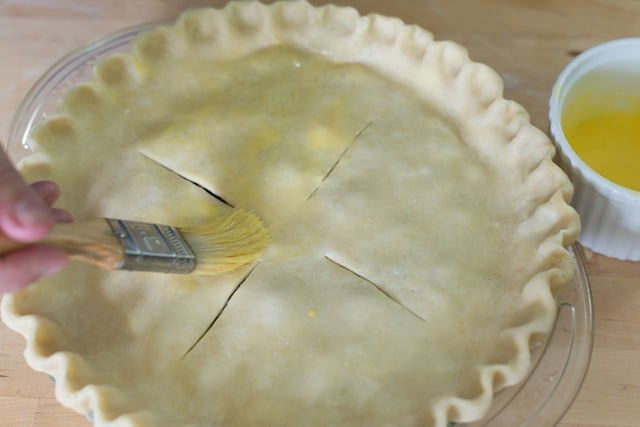
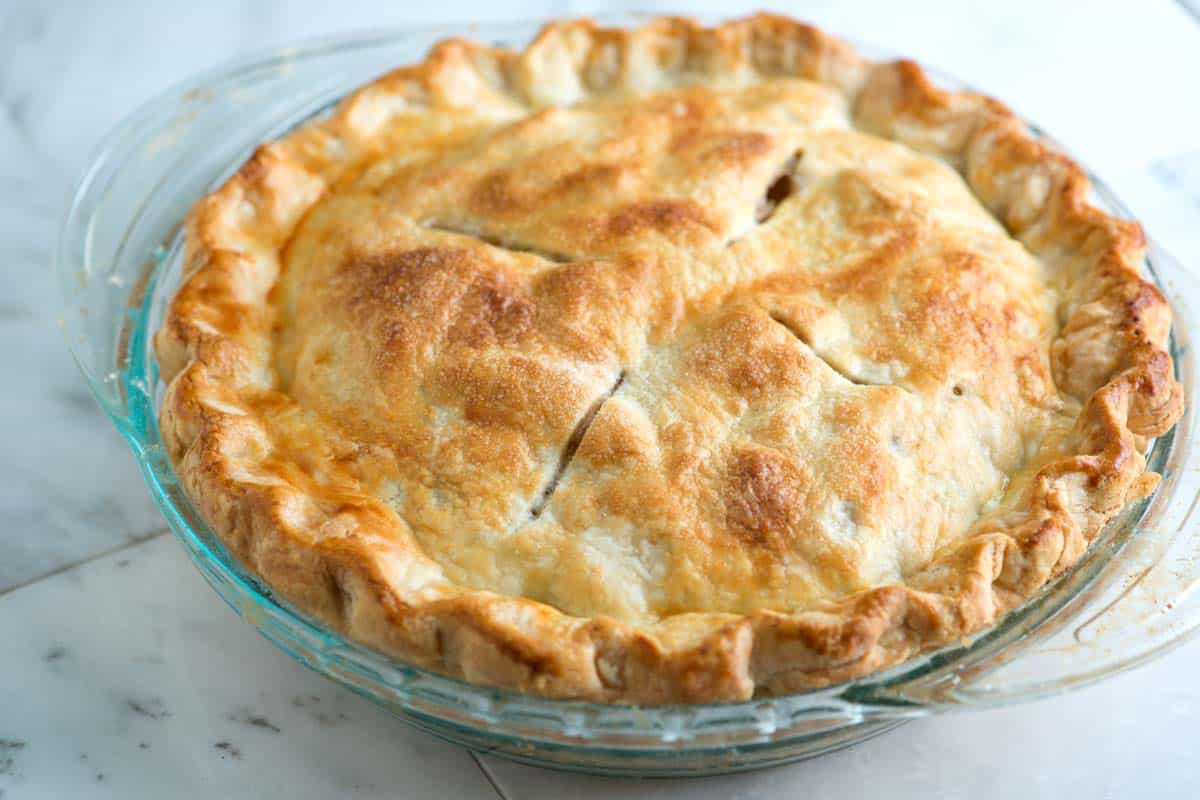
I recommend starting with my all-butter pie crust to make this cherry pie. Once you’ve got your pie dough made, you’ll need to roll it out. We’ll use half of the dough for the bottom crust and half for the top of our pie. My favorite cherry pie filling is simple! We toss cherries with sugar, cornstarch, lemon juice, vanilla, almond extract, and salt. Then, I set the bowl aside so the sugar starts working on the cherries to extract some liquid. I spoon the cherries into my pie crust but leave most of the liquid pooled at the bottom of the bowl, which might seem strange, but adding too much liquid to our pie makes it soggy. Straining your cherry pie filling is a great trick to ensure the filling sets well after baking and cooling. The filling in this cherry pie bakes and cools to be slightly set (not super thick and set). Check the tips section for my recommendations if you prefer a thicker, more set pie. For thicker filling, you’ll take one more step before baking your pie and reduce the liquid on the stove before pouring into the pie with the strained cherries. After adding our top crust, I make 3 to 4 slits in the top so that steam can escape, and then bake until the filling is bubbly, shiny, and thickened. Then we wait. Homemade cherry pie must cool completely before slicing. Otherwise, the filling will be too runny.
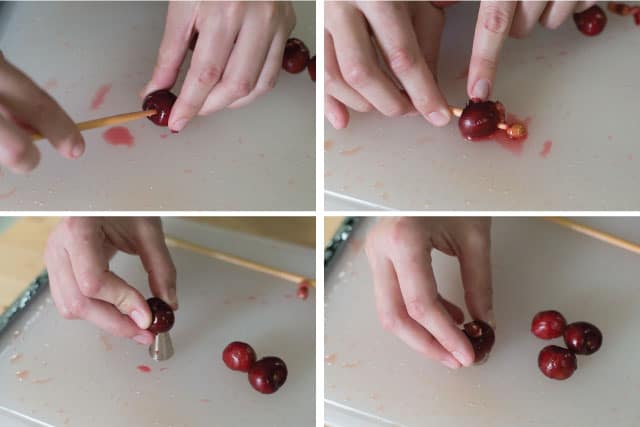
How to Pit Cherries Without a Cherry Pitter
If you don’t have a cherry pitter, don’t worry. I’ve got two ways to pit cherries without one. First, you can use a chopstick, using the thicker end to push the pit out of each cherry. The second option is to use a small piping tip. Place it on the work surface, then push the cherry down onto the tip (the pit pops right out).
Storing Homemade Cherry Pie
Homemade cherry pie lasts up to 2 days, covered on the counter or in the fridge for up to 5 days. For the best results, wrap the pie with plastic wrap or store it in an airtight container. Baked cherry pie can be frozen for up to 3 months when wrapped tightly in plastic wrap and aluminum foil. Thaw overnight in the fridge. 2 ½ pounds (1300g) whole fresh cherries, about 5 cups pitted 2/3 cup (130g) granulated sugar, plus more for top 1/4 cup (30g) cornstarch 1 tablespoon lemon juice 1 ¼ teaspoon vanilla extract 1/4 teaspoon almond extract 1/8 teaspoon salt 1 tablespoon cold unsalted butter, cut into small squares 1 egg yolk 1 tablespoon heavy cream 2Carefully place the dough into the pie dish without stretching it, and trim the edges to within 1 inch of the dish. Refrigerate while you prepare your filling. 2Add pitted cherries to a large bowl, then add the sugar, cornstarch, vanilla extract, almond extract, lemon juice, and salt. Gently toss to combine. Set aside. 3In a large bowl, combine the pitted cherries, sugar, cornstarch, vanilla, almond, lemon juice, and salt. Give it a gentle toss, then set aside on the counter while you roll the top crust. 2Spoon cherry pie filling into the prepared pie crust, but leave most of the liquid pooled at the bottom of the bowl (it makes the pie soggy). Scatter the little squares of cold butter over the filling. 3Carefully place the top round of dough over the filling. Use a knife or pair of kitchen scissors to trim dough to within 1 inch of the edge of the dish. 4Fold the edges of the top crust underneath the edges of the bottom crust, pressing the edge to seal it to create a thicker, 1/4-inch border that rests on the lip of the pie dish. Crimp the edges as desired. 5Whisk the egg yolk and cream to create an egg wash, then brush it over the crust. Sprinkle with extra sugar and refrigerate the pie for 10 minutes before baking. 6Cut 3 to 4 slits through the top pie crust to let steam escape in the oven. 2Place the pie on the hot baking sheet and bake for 20 minutes. Then, reduce the oven temperature to 350°F (177°C) and continue baking for another 35 to 45 minutes. The pie is done when the crust is golden brown and the filling is bubbling enthusiastically. 3If you notice the crust edges browning too quickly, cover them with aluminum foil and continue baking until the pie is fully cooked. 4Allow the pie to cool for 3 to 4 hours before cutting for the best results (this gives the filling time to thicken and set properly).